I’ve said it many times that AR’s are not Legos, and that various tasks in building an AR-15 range in complexity and mechanical aptitude. These tasks range from basic plumbing to small engine repair, and can even include blueprinting the bottom end of your favorite engine.
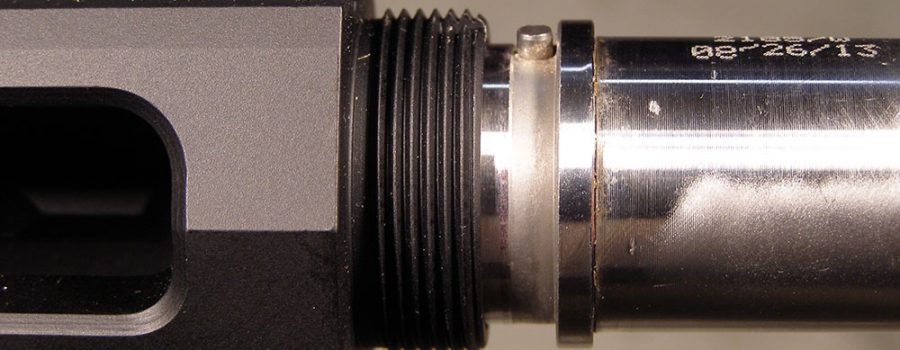
Fitting on a new barrel is pretty much similar to basic plumbing in that it’s a pipe (barrel) with a threaded collar (barrel nut). But it can become more intricate depending upon a few circumstances. Are you looking to optimize accuracy and operational consistency between the BCG and the barrel extension? Then you may want to bed the barrel. Does your barrel require extreme windage or elevation adjustment out of your optic? Then you may need to face your receiver extension or have a look at your barrel extension to make sure that the surfaces are true. Does your bolt take excessive effort to lock up in the barrel extension or are there abnormal marks on the corners of the locking lugs of the bolt? Then you may have a barrel extension that is clocked.
However! Like with most jobs, there are still tools, supplies and tricks that help to make sure it’s been done right. So let’s take a look at my essentials of any AR-15 barrel install.
Shop Essentials
To me this is the often the most important and overlooked item because it’s, well, overlooked and important: a sturdy bench and vice. If you’re fighting a bench that is moving or flopping while you are attempting to torque your barrel nut (YES, you torque the barrel nut!), you stand a good chance of not achieving the proper torque. Worse yet you may damage the barrel or tools if the barrel nut wrench slips off due to the bench or vise moving while under a load.

Next on my list is a gas tube alignment tool. One can be bought or built. Brownells sells them cheap. It’s a rod with a 0.180-inch diameter that fits into the carrier key and replicates the gas tube. Want to make one? Take an old gas tube and cut out a 4-inch straight section from the center of the body. You do not want to include either end piece.

Beyond the above items, other essential shop tools include a fixture to secure the upper receiver. There are different takes on fixtures and I prefer the reaction rod style. I own a few different versions of reaction rods, but my favorite is the Midwest Industries URR.

The reason that I like the MI URR tool is because it performs multiple tasks all at once. It acts like a gauge for the upper receiver bore. The sail on the top of the rod provides solid support to the upper receiver and aligns the rod to the center line of the bore. And it acts as a gauge to tell you if the barrel extension is clocked. I should note that there are some upper receivers on the market that are a snug fit onto the URR and this is due to the tight tolerances held within the receiver by the manufacturer.
There are other fixtures on the market that attach to the upper receiver lugs using quarter inch diameter pins. Some of these fixtures are just a base and will allow access to the inside of the upper receiver, while other versions utilize a piece that will go inside of the upper receiver and provide support to it.
You’ll also need a torque wrench along with an armorer’s wrench, awrench handle, or a wrench head to fit the barrel nut. All that I’ve encountered require a half-inch drive. You can use an adaptor to adapt down to a 3/8” drive torque wrench. The wrench head can vary greatly depending on the barrel nut that goes with your handguard.

If it’s not USGI-pattern (that has 20 “scallops” around its circumference) barrel nut then the manufacturer may provide you with a wrench in the handguard kit. It is not uncommon to find barrel nuts on the market that are proprietary and will require you to purchase a wrench from the manufacturer. Other barrel nuts may require you to purchase a very large crows foot wrench. All of the ones I have are over 1” in size. While I’ve never been able to walk into an automotive parts store to purchase these, you may have better luck if you ever find yourself in need of one of these.
If your barrel nut is USGI-pattern, get a wrench head that fits over and into as much of the nut circumference as you can. My favorite is a Precision Reflex as it gives 360-degree contact, but most are half that (or less). Next up is my Magpul armorer wrench followed by my Tapco armorer wrench. Whatever you use, make sure that it fits securely fitting into those scallops!

Here’s common sense pro tip. I hold in against the wrench head when I work the wrench handle to keep the head from slipping. Easy enough right? I’ve seen many people nut do this and the result is damage to the barrel nut, wrench, or both.
Longer wrench handles are better than shorter ones. Longer makes it easier to make those often-necessary small-but-high-effort nudges easier to feel, and to initiate. I use both a torque wrench and a breaker bar, and the latter is because of the next important item.
Aeroshell 64 or 33! This is a specialized aircraft grease. You can purchase it off of Amazon, but you may also be able to acquire small quantities of it from online shops.
Galling is abrasive wear from the friction that occurs when metals that are compressed against one another are put into motion.
Galvanic corrosion is real and occurs between to dissimilar metals. Typically we are marrying steel and aluminum, but at a bare minimum we are putting steel into aluminum.
If the compressive forces are high enough between the surfaces (and they sure can be), the friction can create heat sufficient to weld the materials together and that then removes material from one surface and places it onto the other. Not good!
A commonly overlooked part of proper lubricant application is the ability to achieve proper torque readings due to the reduced friction between the threads. This is also a reason that we “season” the threads of the barrel nut and receiver extension.
Aeroshell is another very important, often overlooked, and often substituted part of any AR-15 barrel install. It’s a wise precaution, and an asset to easier installation.
Proper Installation
Start by cleaning off all associated surfaces with non-chlorinated Brake Kleen or isopropyl alcohol and let dry. You should clean the inside of the upper and outside of the barrel extension. If you use Brake Kleen make sure that it is only the non-chlorinated version (green can). There have been scientific tests performed and it was found that over time chlorinated Brake Kleen causes micro fractures in steel and premature component failure.
Next, test fit the barrel to the receiver extension by slipping the barrel extension into the upper. Make sure that it will fully insert and that the barrel extension alignment pin aligns with and fits into the receiver extension notch. Dependent upon the manufacturer as well as the manufacturer tolerances, you may find that your barrel extension will not install into the receiver extension (this is a thermal fit receiver extension) or that the barrel and barrel extension may have a decent amount of wiggle due to larger tolerances. It is at this time that if you want to bed the barrel that you will measure the inside diameter of the receiver extension as well as the outside diameter of the barrel extension, and make the necessary calculations for shimming using stainless steel shim stock.
When you are ready to install the barrel you will need to put a light, but even coat of Aeroshell around the outside of the barrel extension as well as inside the receiver extension. When this is complete install the barrel into the receiver extension. If you have a thermal fit upper receiver extension or are properly bedding the barrel using shim stock, then you will need to use a heat gun and apply a proper amount of heat to the receiver extension so that the barrel extension will slide into place.
Now put an even coat of Aeroshell around the circumference of the receiver threads and the threads of the barrel nut. Install the nut hand tight and then using something other than a torque wrench (I use a breaker bar), tighten the nut down firmly, but not enough to exceed the torque spec. You don’t need to gorilla it on. Next, back off the barrel nut and unthread it.
Repeat the above process three or four more times. We call this “seasoning” the threads.
Why?
Because that helps mate the surfaces by facing down any small imperfections which will usually be on the upper receiver extension. The Aeroshell helps this greatly. The tighten/loosen procedure is compressing tiny bits of metal, and the lube is preventing galling, as well as making it easier to loosen. By seasoning the threads, this will also aid us in achieving a true torque reading and proper clamping pressure.
Finally, onto using that torque wrench. Set it at least a couple of foot-pounds under desired torque, and that’s because torque wrenches are calibrated from the center of the handle to the center of the drive socket. Most any wrench head will extend above the drive center, and that increases leverage. If you want to calculate the actual required torque setting there is a formula for it and it can be easily found using Google.

For USGI barrel nuts the universally recommended torque setting is 35 ft.lbs to 80 ft lbs. That figure came from military armorer’s manuals, such as Colt’s M16A1 Armorers Depot Maintenance and Repair Manual and the Army 23 & P manual, both of which I use for reference. Now, 35 ft.lbs is not magic, it’s just minimum. I have commonly found that I will be around 42 ft lbs on USGI barrel nuts when it is properly aligned for the gas tube. But there have been exceptions to this.
If you encounter a stubborn case, like when there’s about a half-scallop to go to get lined up, stop and repeat the tighten/loosen process another 3-4 times. There’s only so much it can do, but it can very often do enough. If this still doesn’t do it, then you may need to try another barrel nut or possibly true the face of the receiver extension.
If you have a barrel nut that is something other than a USGI barrel nut then you will torque the barrel nut to the torque value specified by the manufacturer. Now this may be a value range due to the requirement of having to align the barrel nut for proper gas tube alignment, or it may be a set value.
There is one manufacturer that I can think of that doesn’t use a torque wrench, but you are required to purchase their barrel nut wrench as it has been engineered to use shims and notches on their wrench to determine the proper shim pack to achieve correct barrel nut clamping pressure. I did a video of an install using this system and it can be found on the BRD Gun Works YouTube page.

On the topic of shims. Some manufacturers will include shims with their barrel nuts. These shims are used to achieve proper clocking of the barrel nut for gas tube alignment at a specific torque value. For the most part this is a guessing game of installing and removing shims.
Align the Gas Tube
Now for more about that gas tube alignment thing. This is absolutely critical, or it is if you want your AR-15 to shoot as well as it can, as well as reduce premature wear of the gas tube. This is something that I inspect on every AR that comes across my bench, and most fail.
With a USGI pattern barrel nut, this means one of the scallops has to be dead center in the gas tube receptacle in the upper so the gas tube isn’t touching the nut. Not even a little bit.
If your barrel nut has notches along the outside edge that require alignment for the gas tube, then you do not want any contact as this can cause the gas tube to be pushed to one side or the other. This will typically cause a misalignment with the BCG gas key and can cause premature wear of the tube or create inconsistent bolt lock-up due to carrier movement, and this can affect pure accuracy.
If you’re not using a USGI barrel nut or a nut that requires alignment for the gas tube you are golden for that part. But you still need to inspect the gas tube for contact with the barrel as it goes over the barrel nut. This will usually occur at the front or rear edge of the barrel nut, or both. When this occurs it will cause the gas tube to rise upwards and typically cause an interference fit with the gas key of the BCG and the same wear concerns and possible loss of accuracy as previously described.
This is now when and how the gas tube alignment tool really helps. Remove the bolt from the bolt carrier group, insert the tool in the carrier key, and slip it into the upper. There should be a gap 360-degrees around the tube. It’s a tiny gap, but it’s a gap.
Here is another pro tip for you. Doing this check also allows you to check that the gas key is properly aligned with the bolt carrier. You’d be surprised how many I consistently come across that are not. When you do the above test the gas tube alignment tool should easily slide through the receptacle in the upper receiver without contact with any of the clover looking points in the receiver. If there is contact or if the alignment tool doesn’t pass through then there is a concern. It is either the gas key or an improperly machined carrier and will require further diagnostics.
Ultimately, final check it with the gas tube itself, and the test then is that the gas tube should rattle and move freely all directions.
As I previously mentioned, the reason this is important is that any binding in the gas tube will displace the carrier. I’ve seen individuals on forums and in groups claim that it really doesn’t matter, but, people, ask any and all precision-oriented builders and they will tell you that it absolutely matters for an AR-15 barrel install.
Wrapping it Up
I hope that this article has provided you with some useful insight. I’ve outlined the basics of installing an AR-15 barrel, as well as providing a couple of pro tips. What I did not talk about is verifying your headspace using headspace gauges, verifying feed ramp geometry and correcting if required, pinning A2 style front sight posts or gas blocks, as well as other tasks that are performed or can be performed during a barrel install. As I stated at the start of this, there are various tasks that range in complexity and mechanical aptitude. Are you not sure that you want to take on installing or replacing your barrel? Contact me as this is a service that is offered. Let me be your personal armorer.
BRD Gun Works~ Performance you can afford when you can’t afford failure


